
Posted by Jeffrey Swerdan on Sep 12th 2023
How to Install a Fireplace Mantel
Installing a fireplace mantel can seem like a daunting task, but Northline Express takes you step-by-step through the installation process
It is easy to get overwhelmed by the idea of installing a fireplace mantel, especially with the vast number of fireplace mantel options available on the market today. That and every fireplace mantel manufacturer has a different system set in place to install it. They throw all kinds of terminology at you, including wall cleats, French cleats, hanger straps, L-brackets, corbels, brick anchors, mantel straps, construction adhesive, and the list goes on and on,
The first step is to take a deep breath. Even with the seemingly endless list of fireplace mantel installation options, most mantels are fairly simple to install. In this article, we will walk you through the process and try to cover all of the different types of fasteners that you will encounter and how to install each of them. By the time you finish this article, you should have the confidence to install your fireplace mantel and have the peace of mind that it will stay on the wall, once you add all of your decorations to the top of it. If at the end of this article, you still don't feel comfortable doing your own installation, at least you will have some knowledge so you can ask a professional installer the right questions.
The first step in the installation process is to determine what kind of fireplace you have and if there are any clearance requirements
It is important to reference the heating appliance manual if available. The fireplace manual will list the clearance requirements and will go through the type and size of fireplace mantel that can be used and how close it can be mounted to the firebox. Even if you are replacing an existing mantel, it is still important to double-check the fireplace manual, because the last installer may not have installed the mantel properly.
If you have a masonry fireplace or are unable to locate your product manual, then you will want to refer to your local and state building codes for the proper clearance requirements in your area.
The next step in the fireplace mantel install process is to determine what material your fireplace wall is made of: Is it made of stone, wood, drywall, or brick?
The material that your wall is made out of will play a role in the size and weight of a fireplace mantel that you can choose. It will also change the method for how the back of the mantel will attach to the wall. If your wall is made of stone or brick then you will need a different type of drill bit as well as anchors and possibly construction adhesive to attach the mantel to the wall.
If your fireplace wall is made of wood or drywall, then you will use a stud finder to locate the studs in the wall because you will want to secure the mantel or mantel anchors to the studs. If you do not attach your mantel supports to the studs, your fireplace mantel will most likely fall down at some point.
Fireplace Mantel installation requires a number of tools to help attach the mantel to the wall
Here is a list of tools and materials that are needed for your fireplace mantel installation. The tools will vary depending on whether you are installing a wood mantel or a stone mantel and will also depend on the material the wall is made of.
- Fireplace Mantel - You will want to choose the mantel that suits your style and first the dimensions that you have to work with. It is also a good idea to ensure that the mantel is free from any damage as soon as it arrives. You do not want to wait until install day to inspect it. This could delay your installation for a few days up to a few weeks as you wait for the manufacturer to send a replacement. For help choosing the proper mantel check out our helpful article:
- Mounting Hardware - Most fireplace mantels will include the hardware in the packaging with the mantel. You will want to make sure that the required hardware is in the packaging prior to starting your installation. If it is missing, most manufacturers will send this out to you for free, but it can take a few days or even a couple of weeks depending on the manufacturer. This is why it is good to check that you have this before even starting your installation.
- Level - A trusty long level is the only way to ensure that the mantel is installed evenly. You don't want to "eyeball" the install. This could lead to a crooked or uneven mantel, and then anything you place on top of it has a greater chance of rolling off. A level is the best tool to ensure an even mantel.
- Tape Measure- Tape measure comes in handy when deciding where on the wall you want to install the mantel.
- Pencil or Chalk - If you have a wood or drywall fireplace wall then you will use a pencil to make your marks on the wall. If you have stone or brick then a good piece of chalk will work well and will be able to be wiped off easily
- Stud Finder - No this is not a dating app. A stud finder is a tool that will help you locate the 2 x 4 studs within the wall, so you know where to mount the back of your mantel.
- Drill & Drill Bits - Some people like to use a Hammer Drill or an Impact Driver as their drill of choice, but you will want to drill pilot holes and use the drill for securing the bolts and anchors if needed. They make different kinds of drill bits depending on the type of material you are drilling through.
- Screwdriver - In some cases it is better to use a screwdriver to tighten screws in place of a drill. This prevents over-tightening and stripping of the screw head.
- Box Cutter, Knife, or Scissors - You can use one of these tools to open the packaging that the mantel is shipped in. Be very careful opening the packaging with knives or box cutters. It is way too easy to cut too deep into the packaging and accidentally cut the inside or outside of the mantel. Some manufacturers will indicate on their packaging where to cut and with what kind of a tool to use to open.
From hanging rails to floating shelf brackets, there are several ways to install a fireplace mantel
I know we mentioned the variety of ways that mantels may need to be installed, let's take a quick look at the different types.
Hanger Board System: The hanger board system is an installation method that is used by one of Northline Express's featured fireplace mantel brands: Pearl Mantels. A good number of their mantels will suggest this install method. This system consists of 2 mitered hanger boards where 1 board is attached to the back of the mantel shelf and the other is attached to the wall or mounting surface. When they are joined together the mantel shelf will lock into place.
Metal Hanging Rail System: For non-combustible stone mantels, Pearl Mantels use a Hanger Rail System, which is made of metal instead of wood, such as the Hanger Board System. With the metal hanger rail, it is pre-drilled making it easy to attach to your studs. After measuring, mount the hanger rail into studs and hang your assembled mantel by fitting the tabs on the back of the header shelf over the hanger rail. When properly married together, the surround will be locked in place.
Wall Cleats: Wall cleats are wooden brackets that are attached to the wall studs. The mantel then rests on these cleats. This method is suitable for both lightweight and heavier mantels and provides solid support.
L-Brackets: L-brackets are metal brackets with two flat sides that make an L shape. One side of the bracket is mounted to the wall, and the mantel is attached to the other side of the bracket. L-brackets are a cost-effective way to support your mantelpiece. However, the size and depth of your mantel will dictate what size L-bracket you will want to use.
Corbels: Corbels are basically very decorative L-brackets. They are available in wood or stone and come in a wide variety of sizes. Corbels are a great way to add a decorative touch to the mantel installation while also providing sturdy support for the mantel itself.
French Cleats: French cleats consist of two interlocking wooden strips, one mounted on the wall and the other on the back of the mantel. This method allows for easy removal of the mantel and is suitable for mantels of various sizes and weights.
Floating Mantel Shelf: Floating mantel shelves are installed with concealed brackets or supports. These mantels appear to "float" on the wall, creating a modern and minimalist look. The brackets in floating shelves are usually like a type of hanger rail system.
Brick or Stone Anchors: If your fireplace has a brick or stone surround, you can use masonry anchors and screws to secure the mantel directly to the masonry. These anchors are drilled into the brick or stone to provide stability.
Mantel Straps: Mantel straps are metal brackets that can be used to secure the mantel to the wall. They are often adjustable and provide a sturdy mounting option.
Construction Adhesive: In some cases, construction adhesive such as liquid nails or another adhesive, can be used in conjunction with other mounting methods to provide additional stability. It is applied to the back of the mantel as well as the mounting wall and then held in place until the adhesive dries. Once dried it usually creates a very solid bond. One thing to note about using construction adhesives is that you want to read the label on the adhesive to make sure it is designed to work with the materials you are using it on. Also, double-check what the curing time is for the adhesive. Some may have you wait 24 hours or more before adding items to the top of the mantel.
Traditional Woodworking Techniques: For custom-built mantels, traditional woodworking techniques like mortise and tenon joints or dovetail joints may be used to attach the mantel components securely. This is not a traditional method so unless you are familiar with woodworking techniques this is not a method that you will use.
Hidden Mounting Systems: Some mantels come with hidden mounting systems, such as keyhole slots or other proprietary mechanisms, that make installation easier and provide a clean, finished appearance.
Adjustable Brackets: Adjustable brackets allow you to fine-tune the position and level of the mantel during and after installation, ensuring a precise fit.
One thing to keep in mind with the project is that there are many different ways to install a fireplace mantel and sometimes even the system that comes from the manufacturer may not be the best for your project. Also if you have a very heavy mantel or a mantel with an increased depth, it may be required to do a combination of the methods described above. Also, keep in mind what items you are going to place on the mantel for decoration as this can also add to the weight and the support needed. You can never have too much support.
If you are unsure which method, it may be worth it to contact a professional installer to help determine your best options.
When hanging or mounting a fireplace mantel it is a good idea to have at least two people to make the installation process easy
It is definitely a benefit to have an extra set of hands when installing the fireplace mantel. In some cases, you may need a couple of extra people to help out with the project. The extra sets of hands can hold the mantel in place, while the main installer sets pilot holes, verifies the level, and secures the mantel. There are some very heavy mantels available. Some of the noncombustible, stone mantels can weigh in excess of a hundred pounds or more. Even some combustible wood mantels are made of solid pieces of wood and these can be pretty heavy mantels to try and hold up for a long period of time.
No matter what kind of fireplace mantel or floating shelf bracket you are installing, the first few steps of the installation process are the same
Now that you know what kind of fireplace you have, you have figured out the clearance requirements, you have collected all of the tools you will need, and you have figured out which mounting system you will be using, it is finally time to install your mantel. Here is the basic step-by-step guide for installing your mantel
- Locate the Wall Studs - If you are installing on a wood-framed wall, you will want to find the wall studs and use a pencil to mark where the studs are.
- Measure and Mark the wall - While keeping clearance requirements in mind, figure out where you want to mount the mantel on the wall. This is where having a couple extra sets of hands comes in handy. They can hold the mantel in place to give the homeowner an idea of where they want to mount the top of the Mantel. Once you figure out where you want to hang the mantel, mark the wall with the preferred destination. It is a good idea to make several marks on the wall to help make sure screw holes or hanger rails are level.
- Drill Pilot Holes - Sometimes you have to drill pilot holes in the wall and sometimes you even need to drill them in the mantel itself. Just be very careful that you are using the proper size drill bit and that you take your time so you don't damage the mantel.
- Attach Wall Cleats or Hanger Rail (if applicable) - This will be the step to attach the wall cleats or hanger rail to the wall if you are using this method. Remember you will have to attach the hanger rail to both the wall and to the mantel.
- Attach the Mantel- With the help of your helpers, lift the mantel into place. This is where you want to use your level and your markings on the wall to make sure that the mantel is level. If you are using wall cleats or the hanging rail system, then the mantel should rest on them. If you are not using one of these two systems, then you will need one more step.
- Secure the mantel- This is the step where you would attach L Brackets, corbels, or construction adhesive if you are using one of these methods.
- Finishing Touches- In this step you will fill in any screw holes with wood filler and sand it until smooth. You can also paint the wood filler if you prefer.
- Decorate- Once the mantel is securely installed, you can decorate it with your favorite items like candles, art pieces, picture frames, or seasonal decorations.
Here are some Tips for Installing a Fireplace Surround
If you choose to go with a fireplace surround instead of just a mantel shelf, there will be a couple of additional steps in your installation process.
- After you locate Studs and Measure and Mark your wall, your next step will be to Assemble the Mantel Surround. In most cases, you will assemble all the pieces of the surround prior to mounting it to the wall. Simply follow the manufacturer's instructions to assemble the pieces. Usually, there is a mantelpiece or "top piece" then there are legs or posts that will act as supports for the top piece and will be installed on the side of the firebox.
- Next, there will be additional Safety Precautions that you will have to follow with a surround. If you have a functional fireplace that burns wood or produces a significant amount of heat, there will be clearance requirements that you have to follow. You will want to ensure that the mantel surround is installed at a safe distance from the firebox to prevent a potential fire hazard.
Remember that you can always check with your state and local building codes for specific clearance requirements.
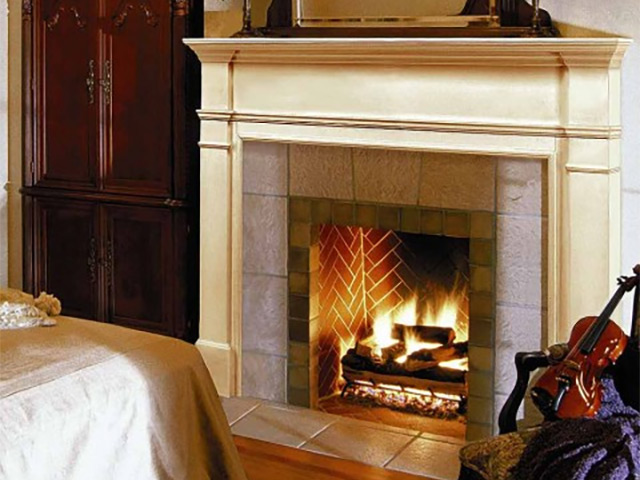
Installing a fireplace mantel properly is a great start toward turning your hearth area into the focal point of the home
In those cold months from fall until spring, you will be spending a lot of time looking at your hearth area. This is why many people want to make the hearth area a focal point of the living room and even of the entire home. The Fireplace Mantel goes a long way in helping bring that dream into reality. Updating an old mantel or choosing to add a new one to the home is a great way to add your artistic touch to the area. Remember there are several ways to decorate and design your hearth area and there is no one way that it has to be, so have fun with the process!
Check out our full line of Fireplace Mantels and Fireplace Surrounds as well as our Fireplace Accessories on Northline Express
The Northline Express Resource Center is the best place to learn about fireplace mantel installations
Check out our Resource Center for helpful articles about Mantels, Surrounds, and other Fireplace topics. Here are a few
- Fireplace Mantel FAQs
- How to Choose a Fireplace Mantel
- How to Install a Fireplace Mantel
- How to Measure for a Fireplace Mantel
- How to Decorate a Fireplace Mantel
You can also check out the Northline Express YouTube Page where we review many of the fireplace mantels and surround models that we carry on our website.
This Article has been approved by our on-staff NFI Certified Specialists & Master Hearth Professionals.
Fireplace Mantels
Our fireplace accessories collection includes a large selection of fireplace surrounds and fireplace mantel shelves that will create an elegant backdrop for your fireplace and be a popular gathering place for friends and family.
Shop Now

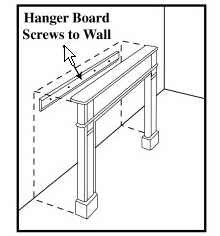
If your fireplace mantel did not come with a hanger board, follow these directions to fabricate one.
If a hanger board was not included with your fireplace mantel you can fabricate one using a 1 x 4, cut at a 45-degree angle. You may also cut a piece of wood that runs the length of the mantel shelf or use 2 blocks of wood that will be placed at either end of the mantel shelf. See above for measuring. Set the mantel on the length of wood or blocks. Use finishing nails on the back side of the mantel legs (underneath the back overhang of the mantel shelf) to fasten the length or blocks.
Scribe molding

Once your fireplace mantel is installed, put the molding to the inside of each leg and just below the mantel shelf. Be sure to slide the molding back until it touches your surround. Scribe molding is meant to hide the gap between the leg and the surround on the inside. You can attach scribe molding to your fireplace mantel with glue or small finishing nails.
Plinth bases can be used to add height to your fireplace mantel. Plinth blocks are sold in pairs of two. They are to be placed under each leg of the fireplace mantel to add height, lend extra support to the mantel, and create an effective focal point at the base of the mantel. To determine which plinth pair is right for your mantel, take the "outside leg to outside leg" measurement, subtract the interior opening and divide by 2 to obtain the width of each leg. Then choose your plinth accordingly.
See our selection of fireplace mantels, fireplace mantel shelves, and fireplace mantel accessories. If you have any questions concerning how to install your fireplace mantel feel free to contact one of our customer service representatives at 1-877-734-2458 .