
Sep 2nd 2011
Wood Stove Installation
How to Install a Wood Stove
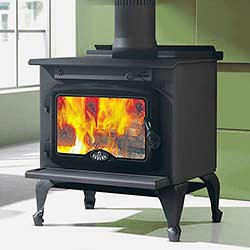
Lowering your annual heating bills and creating a cozy and welcoming atmosphere in your home is as easy as installing a wood burning stove. Whether you use your wood stove to heat your entire home or as an alternate heat source for zone heating, the warm glow and ambiance, the crackling of the firewood, the smell of the wood burning fire, and the cozy warmth that a wood stove produces has a way of instantly making people feel relaxed and at home.
Proper installation of your wood burning stove is critical as improperly installed wood stoves are a fire and smoke damage hazard. Use the following tips and guidelines to help you properly install your wood stove. These helpful hints will ensure safe operation with your wood burning stove and ultimately allow you to achieve the best heating results with your investment.
Wood Stove Installation Step 1 - Wood Burning Stove Location
Wood stove location - The first thing you have to do when installing a wood burning stove is decide where in your home you want your wood stove to be located. Keep in mind that your wood stove needs to be installed a certain distance away from combustible materials such as drapes and doors. The distance from a wall can vary from stove to stove, but it can be as little as 6 to 12 inches from a wall depending on the model of the wood stove. Also remember, you want to place your wood burning stove in the area that you and your family use the most in your home.
In most cases the chosen wood stove installation area will require the use of a hearth pad as the floor underneath the wood burning stove must be fire proof. Stove boards are made with high quality, fire and heat resistant materials that withstand the weight of heavy wood burning stoves without cracking or splitting and protect your floors from hot coals. Stove boards are available in a variety of colors, sizes, and shapes that not only add protection but style and beauty to wood burning stoves.
See our selection of stove boards to protect your walls and floors during the wood burning season.
Wood Stove Installation Step 2 - Wood Burning Stove Flue Collar Diameter
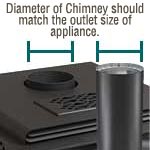
To get started with your wood burning stove application, you'll need to determine the diameter of your chimney. The diameter of your chimney will usually be the same size as the flue collar on your wood stove. You should follow wood stove manufacturer recommendations whenever you can.
It is important that you never use a chimney that smaller in diameter than the flue size of the wood stove that it is being connected to. Not matching the chimney diameter to the wood stove diameter will result in poor draft and excessive creosote formation.
Wood Stove Installation Step 3 - Vertical or Horizontal Chimney Pipe Venting
 Depending
on the build of your home and where you place your wood burning stove, applications will vary. You will need to
determine if your wood burning stove will be vented through the wall or through the ceiling.
Depending
on the build of your home and where you place your wood burning stove, applications will vary. You will need to
determine if your wood burning stove will be vented through the wall or through the ceiling.
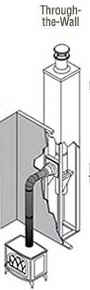
A through the wall installation requires the use of elbows, tees, and wall thimbles. The use of these additional components should be avoided if possible during your wood stove installation as offsets and obstructions within the chimney system will restrict the natural draft.
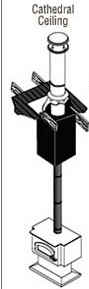
A wood stove that is installed to vent through the ceiling will be more efficient and produce less creosote deposits because it vents straight up and out without any bends in the structure to obstruct the draft. The primary venting choice for a wood stove installation is through the ceiling with high-tech pipe or through an existing chimney.
You should always install the chimney pipe on the interior of the home when installing your wood burning stove. This is important because a cold exterior chimney will produce less draft and will also generate more creosote build up. If an offset is required to avoid rafters or other obstructions for your wood burning stove application, be advised that elbows greater than 30 degrees are not allowed in the United States. A maximum of two offsets in a single installation are permitted and at least one elbow strap is required for each offset.
Wood Stove Installation Step 4 - Stove Pipe
Black stove pipe is used on the interior of the home from the top of the wood stove to the bottom of the ceiling or wall where it will connect to class-A chimney pipe or a masonry chimney thereafter. You will need to match your stove pipe diameter with the diameter of the flue size on your wood burning stove. Never use stove pipe in place of class-A chimney once you have passed through the ceiling or wall. Stove pipe is strictly for use inside of the home during your wood stove installation.
Whether you will need single-wall or double-wall stove pipe depends on the clearance to combustibles that your wood stove installation requires. Single-wall black stove pipe requires at least an 18" clearance to combustible materials. Single-wall black stove pipe will also radiate more heat than double wall stove pipe, it costs less and can be cut to specific lengths if needed during the wood burning stove installation.
-Or-
Double-wall black stove pipe requires at least a 6" clearance from walls and 8" from ceilings when used in horizontal applications. After double-wall stove pipe is installed, it vents the wood burning stove while remaining relatively cooler to the touch than single wall black stove pipe does. Clearance to combustible materials can be reduced with the use of a pipe heat shield for both single-wall and double-wall stove pipe applications.
Be advised that mobile home wood stove installations will require double wall stove pipe for added safety.
Wood Stove Installation Step 5 - Class-A Chimney Pipe
Once you have reached the ceiling or wall during your wood burning stove installation, you will need the insulating power of a Class-A chimney system to proceed through the wall or all the way up past the roof. You will need to use the same size class-A chimney pipe as the stove pipe that you used which is once again determined by your wood stove flue diameter.
Depending on your wood stove's flue diameter, you will have a few different options to choose from for your class-A chimney pipe venting system. Class-A chimney pipe venting systems are available with double-wall or triple-wall construction. The listing required for your particular wood stove may be specified by the manufacturer or your local building codes may require a particular listing, either in general or for specific types of fuel appliances. This can be a reason for using triple-wall chimney vent pipe rather than double-wall. You will need to install the chimney pipe meeting the most restrictive listing.
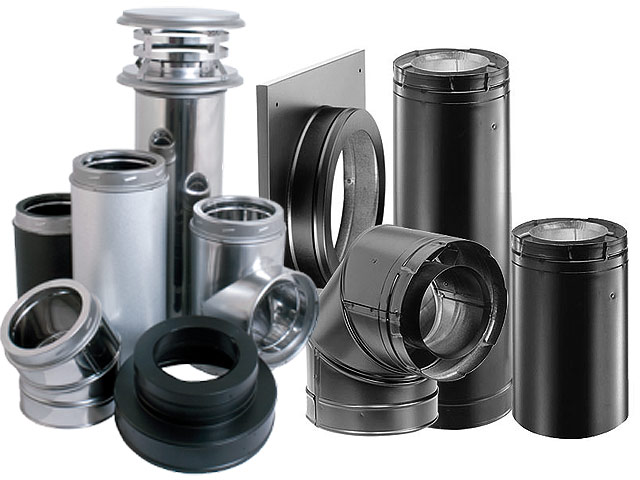
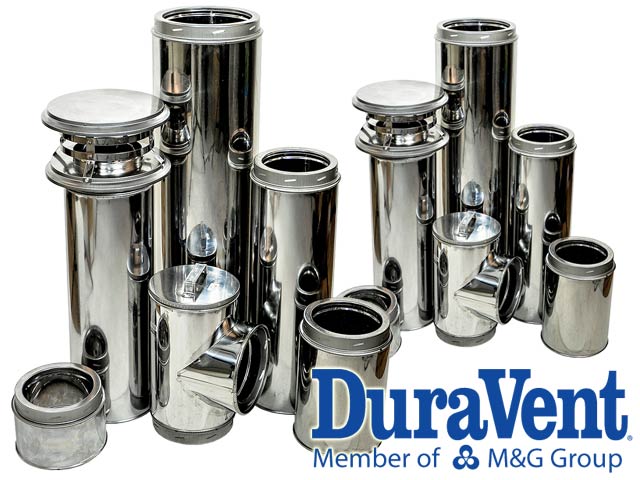
If you have the choice between double wall and triple wall chimney vent pipe, we highly recommend DuraPlus and DuraTech class-A chimney venting systems.
DuraTech is a double-wall all-fuel chimney system that offers the optimum in safety and performance. DuraTech has a Thermal Tech insulation blanket that is encases in between the double-wall to keep the outer wall of the chimney cool while maintaining high flue temperature which ensures optimum draft performance.
DuraTech features an inner wall that is 25 percent thicker than other chimney systems for an extra margin of safety and its twist lock fittings make for easy installation without the use of locking bands of mechanical fasteners. DuraTech is preferred by professional installers and is available in 8 different lengths up to 60" long and 3 different finishes.

DuraPlus is a triple-wall all-fuel chimney system that is designed to boosts stove efficiency by staying cool on the outside while providing the hot draft that is required to eliminate creosote build-up on the inside. The triple-wall design of DuraPlus makes for a fire-safe construction that protects both the chimney and the building.
DuraPlus chimney systems also have two insulating layers that consist of a ceramic blanket, plus air space. The ceramic blanket insulation is held securely in place, eliminating hot spots common with loose-fill type installations. DuraPlus is specifically designed with the Do-it-Yourselfer in mind with easy twist lock connections and is available in a Wide variety of galvanized and stainless steel.
See our chimney pipe differences article to compare DuraTech, DuraPlus and other chimney venting systems further to decide which selection is best for you.
Wood Stove Installation Step 6 - Finishing Your Installation
Depending on whether your wood stove application is vented through the ceiling or through the wall, additional components to finish your installation will vary. For example a through the wall installation where your wood stove application vents out and up the side of your home will require the use of wall straps, possibly an extended roof bracket, and a rain cap. A through the ceiling installation where your wood stove application vents straight up and out the roof of your home will require the use of a flashing, a storm collar, and a rain cap.
The chimney must extend at least 3 feet above the highest point where it passes through the roof, and be at least 2 foot higher than any part of the building within a horizontal distance of 10 feet. The termination cap is installed above this point. If the chimney pipe extends more than 5 feet above the roof, an extended roof bracket must be installed to provide stability.
See our help page on how to measure roof pitch to finish your installation with a flashing.
NorthlineExpress.com carries a large selection of chimney vent pipe to complete your wood stove installation as well as an impressive selection of beautiful, EPA Certified wood stoves to complete your wood stove application. We have knowledgeable and friendly staff members standing by to help you choose the perfect wood stove or to assist you with any questions you may have concerning your wood stove application. Install your wood burning stove today and enjoy the cozy, welcoming atmosphere that only a wood burning fire can provide.